Hey guys!
Nesse post eu gostaria de compartilhar com vocês como aumentar a velocidade das suas consultas alterando a configuração de energia do servidor
Introduction
Se você acompanha a comunidade técnica de TI, especialmente de SQL Server, você certamente conhece o Fabrício Lima, CEO da PowerTuning e um dos pioneiros no que se refere à blog sobre SQL Server no Brasil.
Há alguns anos ele relatou um caso bem interessante no artigo “Casos do Dia a Dia: Comprei um servidor melhor e o SQL Server está mais lento! Como pode???” onde um cliente compra um servidor muito melhor que o anterior e as consultas acabam ficando bem mais lentas do que no servidor antigo por conta do plano de energia do Windows.
Desde então, sempre analiso isso quando vou acessar um novo ambiente. Apesar de acreditar em todas as referências que ele cita no post dele (e também acredito nele kkkk), eu queria testar isso no meu próprio ambiente e tirar minhas conclusões sobre isso.
O ambiente de testes
Para a realização dos testes desse post, utilizarei a seguinte tabela:
|
1 2 3 4 5 6 7 8 9 10 11 12 |
USE [dirceuresende] GO IF (OBJECT_ID('dbo.TesteCPU') IS NOT NULL) DROP TABLE dbo.TesteCPU SELECT TOP(10000) MyInt = CONVERT(BIGINT, o1.[object_id]) + CONVERT(BIGINT, o2.[object_id]) + CONVERT(BIGINT, o3.[object_id]) INTO dbo.TesteCPU FROM sys.objects o1 JOIN sys.objects o2 ON o1.[object_id] < o2.[object_id] JOIN sys.objects o3 ON o1.[object_id] < o3.[object_id] |
A consulta que utilizarei para testar a performance em planos de energia diferentes será essa:
|
1 2 3 4 5 6 |
SELECT SUM(CONVERT(BIGINT, o1.MyInt) + CONVERT(BIGINT, o2.MyInt)) FROM dbo.TesteCPU o1 JOIN dbo.TesteCPU o2 ON o1.MyInt < o2.MyInt OPTION(MAXDOP 16) -- Forçar usar todos os cores do meu servidor |
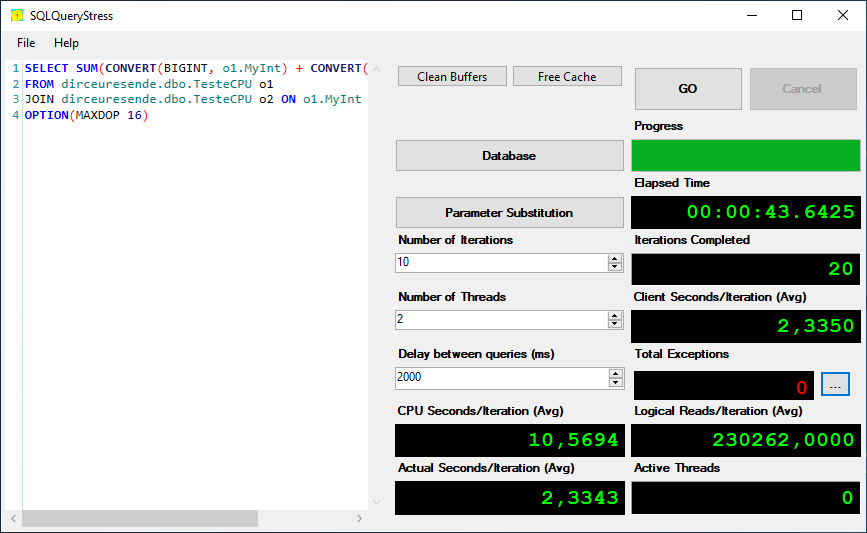
A ferramenta que utilizarei para executar várias consultas simultaneamente e medir os tempos de execução, é a SQLQueryStress, a qual já falei sobre ela no artigo SQL Server – Como utilizar a ferramenta SQLQueryStress.
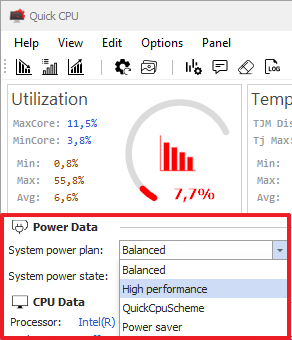
Para gerenciar os meus planos de energia, ativar/desativar o Turbo Boost e gerenciar as frequências do meu processador, utilizo a ferramenta Quick CPU, que acho a melhor disponível para Windows para gerenciamento de processador.
E por fim, o processador utilizado nesse teste é um Intel i9 9900K de 8 núcleos e 16 cores lógicos, com Turbo Boost 2.0 habilitado, onde defini uma frequência máxima de até 4.7 GHz.
Os Testes
Utilizando a ferramenta SQLQueryStress, vou executar a consulta que compartilhei acima (que força usar todos os 16 cores) em 10 iterações, executando 2 vezes simultaneamente em cada iteração.
Adicionei um tempo de espera de 2 segundos entre cada consulta, para deixar o processador “descansar” e reduzir o clock.
E o resultado foi esse aqui:
Utilizando o plano de energia Economia de Energia:
59.21 segundos de duração total, 3.91 segundos de tempo médio de execução e 18.5 segundos de CPU (paralelismo) em cada iteração

Utilizando o plano de energia Alta Performance:
43.64 segundos de duração total, 2.33 segundos de tempo médio de execução e 10.56 segundos de CPU (paralelismo) em cada iteração
Como puderam observar, no plano de energia Alta Performance, tivemos uma redução na duração total de 21%, redução no tempo médio de execução de 40.4% e redução no tempo de CPU de 43%.
O que está acontecendo?
Para tentar entender o que pode estar causando essa diferença tão absurda de performance devido a uma simples configuração do plano de energia do Windows, vamos entender como esses planos de energia funcionam. Segundo a documentação oficial, temos 3 planos de energia por padrão no Windows:
- Equilibrado: Esse plano oferece desempenho total quando você realmente precisa. Esse plano economiza energia durante períodos de inatividade.
- Economia de energia: Esse plano economiza energia reduzindo o desempenho do sistema. Ele pode ajudar os usuários de PC móveis a tirarem o máximo de proveito de uma única carga de bateria.
- Alto desempenho: Esse plano maximiza a capacidade de resposta e o desempenho do sistema. Os usuários de PCs móveis podem perceber que a carga da bateria não dura tanto tempo quando eles utilizam esse plano.
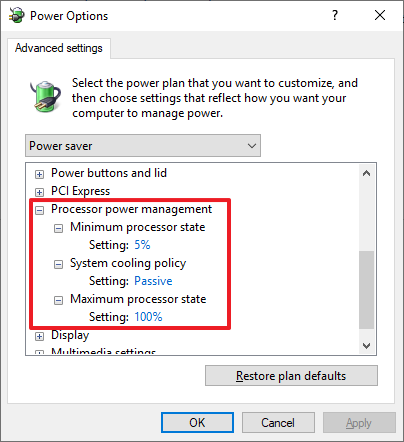
Para entender exatamente o que esses planos de energia do Windows tem de diferente um do outro, podemos visualizar as configurações avançadas de cada plano de energia:
Economia de Energia (uso mínimo de CPU em 5%, uso máximo em 100% e resfriamento passivo)
Balanceado (uso mínimo de CPU em 5%, uso máximo em 100% e resfriamento ativo)

Alta Performance (uso mínimo de CPU em 100%, uso máximo em 100% e resfriamento ativo)
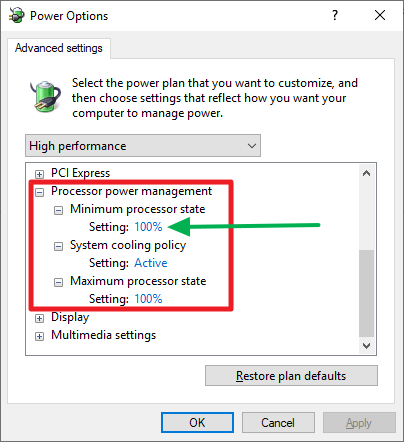
Como podemos observar, a maior diferença é com relação ao resfriamento (ativo/passivo) e o uso mínimo de CPU. Enquanto nos modos “Balanceado” e “Economia de Energia”, o uso mínimo é 5% e a frequência do clock da CPU ficará variando de 5% a 100% da capacidade máxima, conforme a utilização, no modo de energia “Alto Desempenho”, o Windows irá sempre utilizar o máximo da capacidade de CPU todo o tempo.
Nos modos de energia “Balanceado” e “Economia de Energia”, se o servidor de banco possui períodos onde tem pouca atividade e de repente ele recebe algumas consultas pesadas, ele acabará tendo que subir a velocidade do processador quando essa consulta pesada chegar e logo após executar, reduzirá o clock automaticamente para economizar energia.
Nos meus testes com o Turbo Boost habilitado, o plano de energia “Economia de Energia” só subiu a frequência do processador até o máximo nominal do processador (3.6 GHz) e atingiu mínimas de 1.4 GHz. O plano de energia “Balanceado” atingiu 4.7 GHz quando executei algumas consultas e após executar, ficou variando entre 3.5 GHz e 4.5 GHz. No plano “Alto Desempenho” o clock ficou variando entre 4.5 e 4.7 GHz.
E isso que faz a diferença no “mundo real” quando se utiliza outro plano de energia que não o “Alto Desempenho”
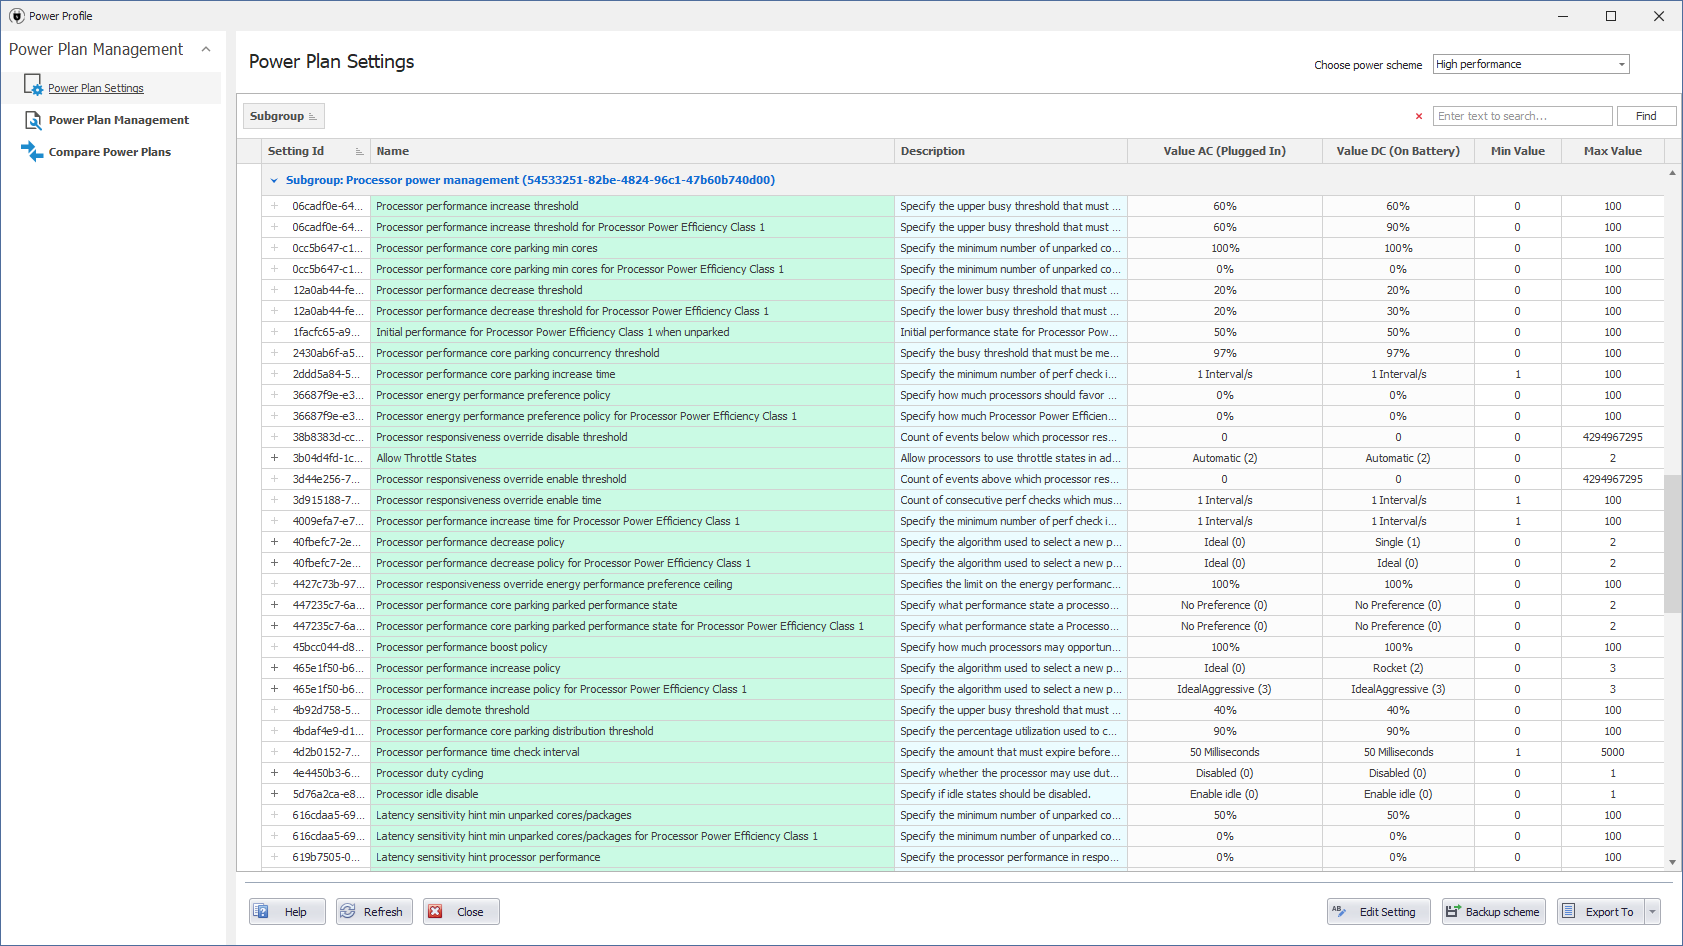
Você também pode utilizar o Quick CPU para analisar com mais detalhes os planos de energia:
Como identificar e alterar o plano de energia atual
O jeito mais fácil de identificar e alterar o plano de energia atual é utilizando a tela de Escolha do plano de energia do Windows. Para abrir ela tela, abra a tela do Prompt do DOS ou a janela do Executar (Windows + R) e digitar isso:
|
1 |
%windir%\system32\control.exe /name Microsoft.PowerOptions |
Você também pode digitar “power plan” no menu Iniciar

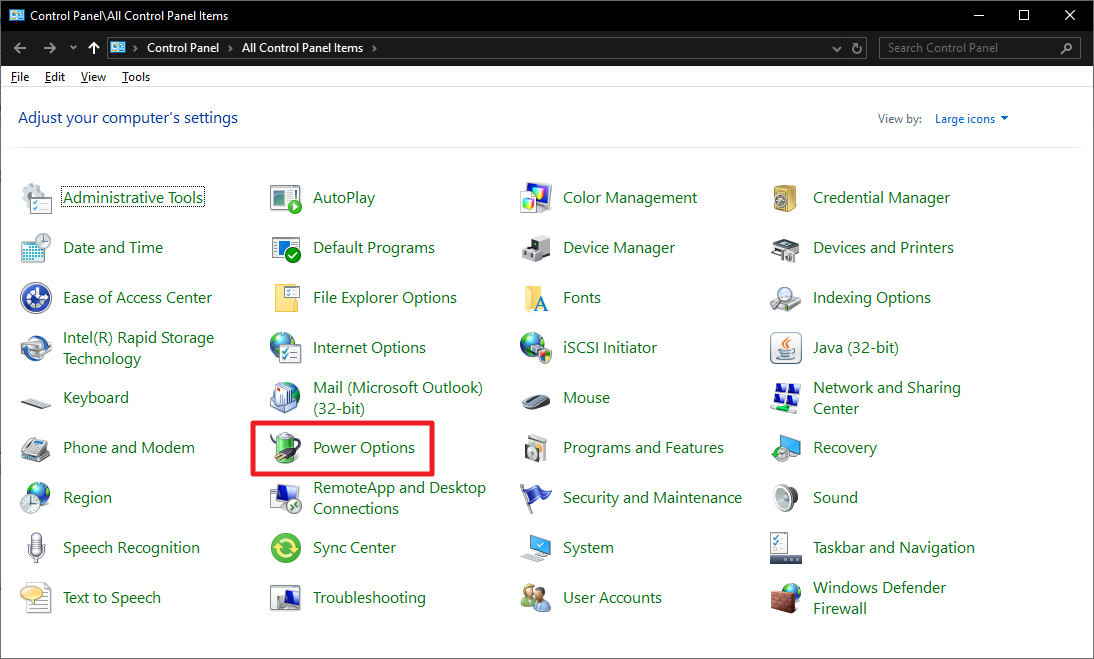
Pode acessar as opções de energia pelo Painel de Controle também:
Ou mesmo, utilizando a ferramenta Quick CPU
Como identificar e alterar o plano de energia atual pelo SQL Server
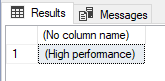
Caso você não tenha acesso RDP ao servidor e precise identificar utilizando apenas o SQL Server, você pode utilizar a consulta abaixo:
|
1 2 3 4 5 6 7 8 9 10 11 12 13 14 |
DECLARE @value VARCHAR(64) EXEC master.dbo.xp_regread @rootkey = 'HKEY_LOCAL_MACHINE', @key = 'SYSTEM\CurrentControlSet\Control\Power\User\PowerSchemes', @value_name = 'ActivePowerScheme', @value = @value OUTPUT; SELECT (CASE WHEN @value = '381b4222-f694-41f0-9685-ff5bb260df2e' THEN '(Balanced)' WHEN @value = '8c5e7fda-e8bf-4a96-9a85-a6e23a8c635c' THEN '(High performance)' WHEN @value = 'a1841308-3541-4fab-bc81-f71556f20b4a' THEN '(Power saver)' END) |
Result:
E para alterar o plano de energia também pelo SQL Server (o usuário do serviço precisa ter permissão para isso), você pode utilizar o comando abaixo:
|
1 2 3 4 5 6 7 8 9 10 11 12 13 14 15 16 17 18 19 20 21 22 23 24 25 26 27 28 29 30 31 |
DECLARE @Fl_Xp_CmdShell_Ativado BIT = (SELECT (CASE WHEN CAST([value] AS VARCHAR(MAX)) = '1' THEN 1 ELSE 0 END) FROM sys.configurations WHERE [name] = 'xp_cmdshell') IF (@Fl_Xp_CmdShell_Ativado = 0) BEGIN EXECUTE sp_configure 'show advanced options', 1; RECONFIGURE WITH OVERRIDE; EXEC sp_configure 'xp_cmdshell', 1; RECONFIGURE WITH OVERRIDE; END -- 8c5e7fda-e8bf-4a96-9a85-a6e23a8c635c (High Performance = Alta Performance) -- 381b4222-f694-41f0-9685-ff5bb260df2e (Balanced = Balanceado) -- a1841308-3541-4fab-bc81-f71556f20b4a (Power saver = Economia de Energia) EXEC sys.xp_cmdshell 'powercfg.exe /setactive 8c5e7fda-e8bf-4a96-9a85-a6e23a8c635c' -- High Performance IF (@Fl_Xp_CmdShell_Ativado = 0) BEGIN EXEC sp_configure 'xp_cmdshell', 0; RECONFIGURE WITH OVERRIDE; EXECUTE sp_configure 'show advanced options', 0; RECONFIGURE WITH OVERRIDE; END |
References
- Casos do Dia a Dia: Comprei um servidor melhor e o SQL Server está mais lento! Como pode???
- Windows Power Plans and CPU Performance
- Power Plans and Windows Server 2008 R2
- SQL Server on Power-Saving CPUs? Not So Fast.
And that's it, folks!
Espero que tenham gostado desse post e até a próxima!
Boa tarde Dirceu… parabéns pelo blog e pelo post, comecei acompanhar você tem uns dias e estou achando bem interessante os conteúdos. Tentei implementar o script para mudança de energia pelo SQL Server, até consegui fazer a consulta e ver qual energia está sendo utilizada pelo windows, mas alterar o plano deu que não tenho permissão. Procurei bastante coisas pela internet pra ver se conseguia achar qual permissão preciso ter para fazer essa alteração, mas sem sucesso. Você pode me ajudar nessa parte? Se a permissão tem que ser do logon ou tem que ser permissão do windows? Desde já agradeço.
muito bom, vou fazer no dev para testes !