Post Views 19,302 views
Neste post, irei demonstrar como instalar o Oracle Database 11g no ambiente Windows, o que é muito utilizado atualmente pela facilidade e praticidade do sistema operacional da Microsoft.
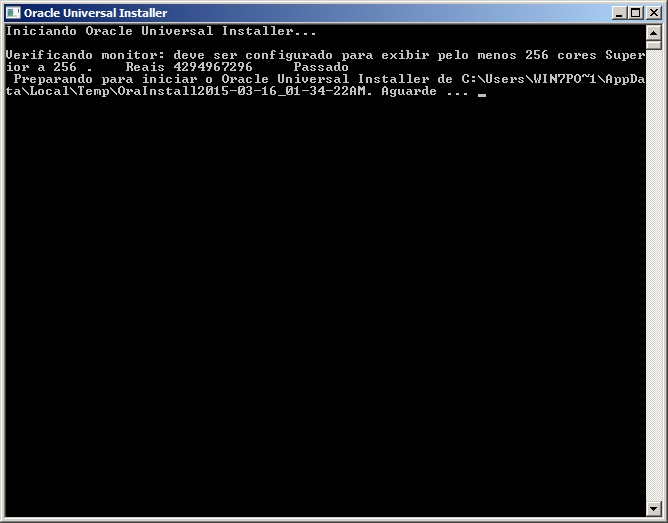
- Execute o arquivo setup.exe para iniciar a instalação

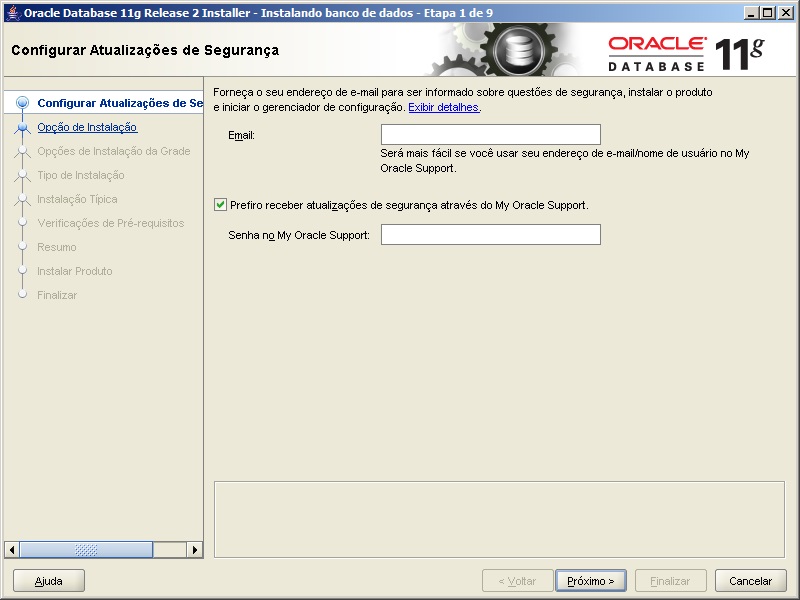
- Na primeira tela de instalação, podemos definir um e-mail para receber atualizações da Oracle. Este passo pode ser ignorado, caso você deseje.

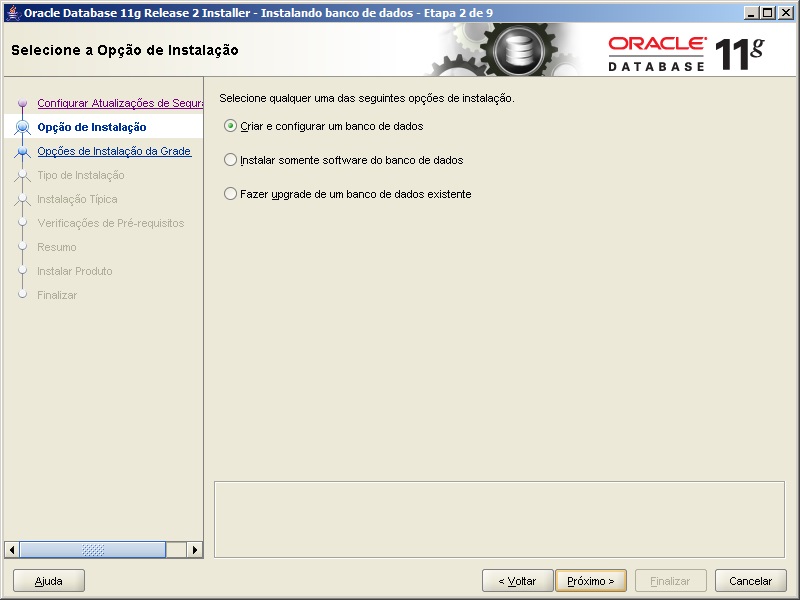
- Na etapa 2, podemos escolher o tipo da instalação:
– Criar e configurar um banco de dados: Escolha esta opção para criar um novo banco de dados juntamente com os exemplos de esquemas.
– Instalar somente o software do banco de dados: Escolha esta opção para instalar os binários do banco de dados. Para configurar o banco de dados, você deve executar o Assistente de Configuração do Oracle Database após a instalação do software.
– Fazer o upgrade de um banco de dados existente: Esta opção instala os binários do software em um novo Oracle home. Ao fim da instalação, você pode fazer o upgrade do banco de dados existente.
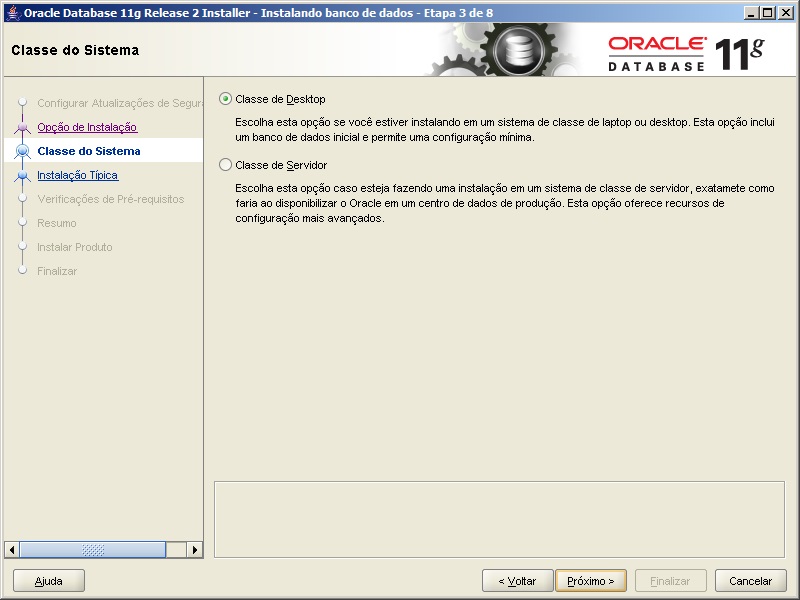
- Na etapa 3, podemos escolher a classe de instalação do nosso banco
– Classe do Desktop: Esta opção inclui um banco de dados inicial e permite uma configuração mínima. Esta opção é designada para aqueles que desejam instalar e executar o banco de dados rapidamente.
– Classe de Servidor – Esta opção permite mais opções de configuração avançada. As opções de configuração avançada disponíveis ao usar esta opção incluem o Oracle RAC, Gerenciamento de Armazenamento Automático, configuração de backup e recuperação, integração com o Enterprise Manager Grid Control e um ajuste de memória mais refinado, entre muitas outras.
- Vamos selecionar a opção “Classe de Servidor”.
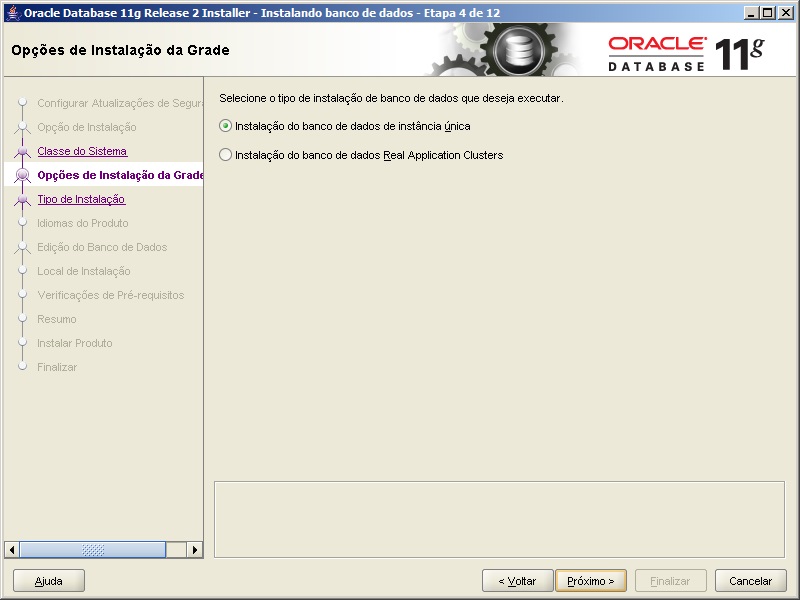
- Na etapa 4, vamos definir se o nosso banco de dados será de uma instância única ou uma instalação RAC (Real Application Clusters), que exige mais de um servidor. Vou instalar como instância única e depois faço um post de instalação de RAC.
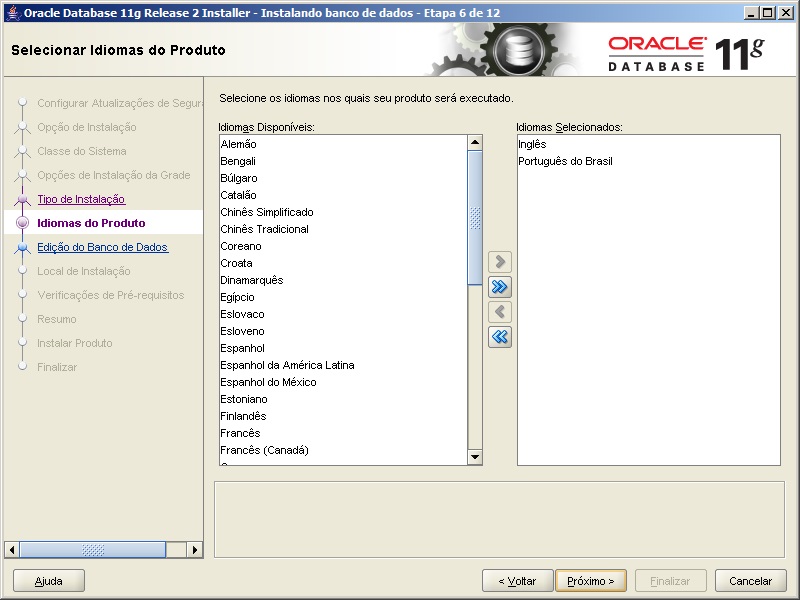
- Na etapa 5, podemos escolher o idioma do produto que será instalado.
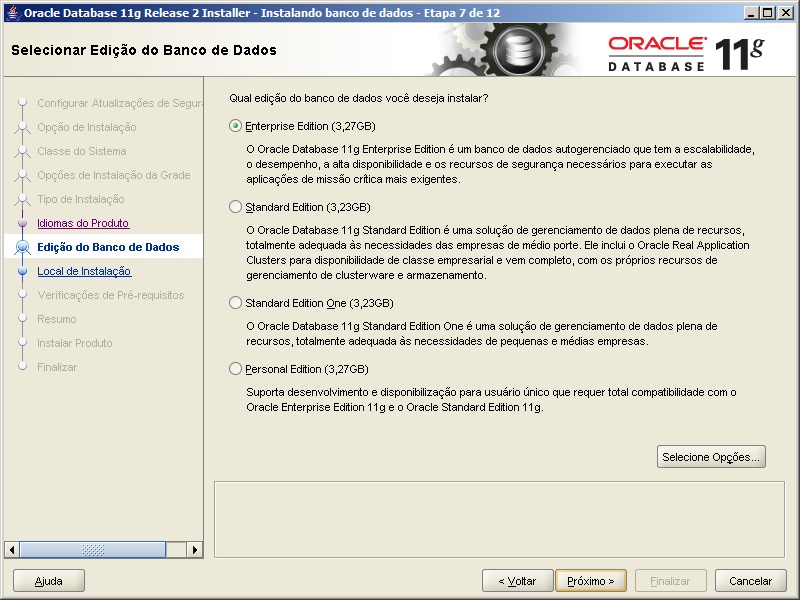
- Na etapa 7, devemos escolher a edição do banco de dados e você deve selecionar a edição no qual você possui licença para utilização. No caso do exemplo, irei utilizar a edição “Standard Edition”.
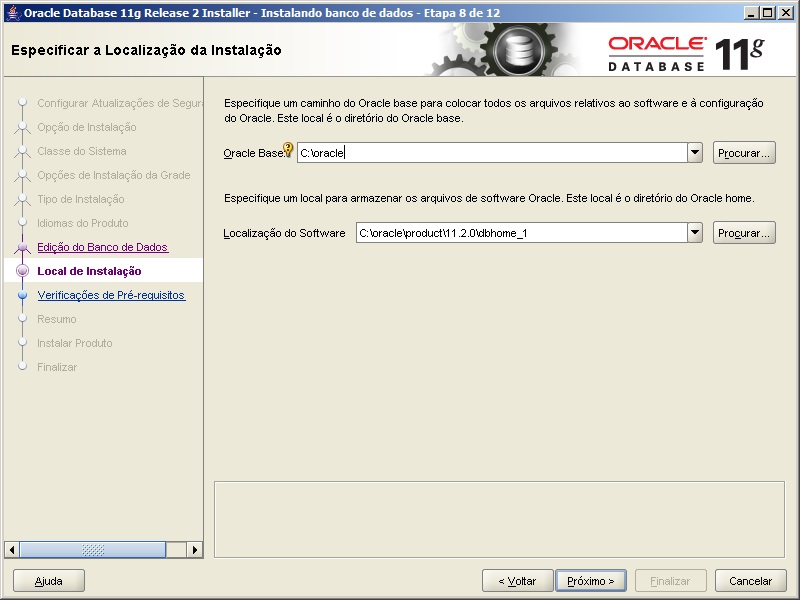
- Na etapa 8, selecionamos o local de instalação dos binários do Oracle Database 11g.
- Na etapa 9, vamos definir o tipo de finalidade do banco de dados. No exemplo, vou selecionar a opção “Finalidade Geral / Processamento de Transações”
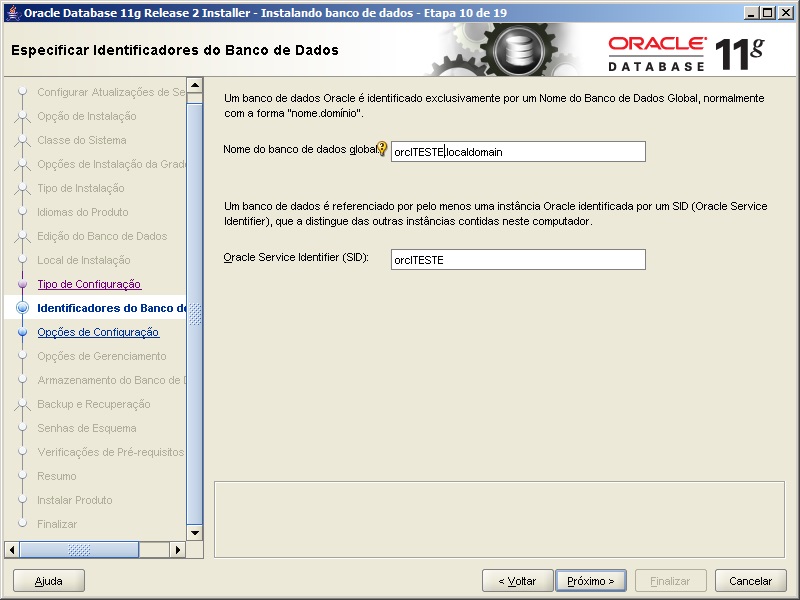
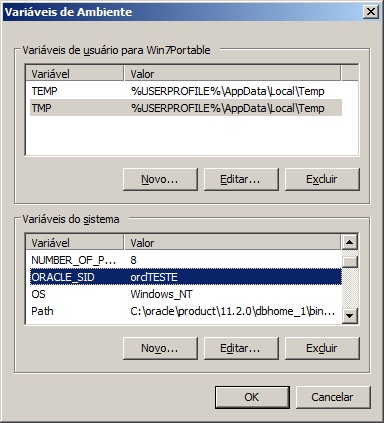
- Na etapa 11 é onde definimos o nome do banco de dados e o nome da instância que estamos instalando. O nome global é único por banco de dados e o SID é único por instância, lembrando que um banco de dados pode ter várias instâncias e o SID será diferente para cada uma das instâncias.
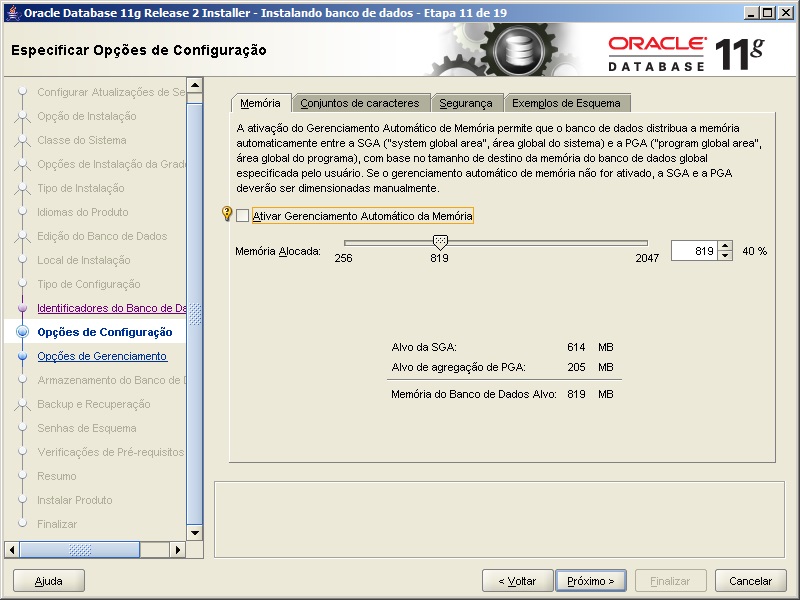
- Na etapa 11, podemos definir as configurações de memória do Oracle Database 11g. O Oracle Universal Installer calcula e exibe um valor default para a alocação da caixa giratória de Memória Alocada e ajusta a barra deslizante de acordo. Os valores da barra deslizante também são limitados aos valores máximos e mínimos de acordo com a memória física disponível. Você pode usar a barra deslizante ou a caixa giratória para especificar o valor (MB) para a quantidade de memória que você deseja alocar para o banco de dados de acordo com os requisitos do banco de dados.A opção Ativar Gerenciamento Automático da Memória é selecionada por default. Esta opção ativa o banco de dados para que o mesmo distribua automaticamente a memória alocada entre a SGA (System Global Area) e a PGA (Program Global Area). Se você cancelar a seleção desta opção, a SGA e a PGA deverão ser dimensionadas manualmente.Se esta opção for selecionada, o status da distribuição de memória entre as áreas de memória será exibido como AUTO na tela. Se a opção não for selecionada, a distribuição de memória entre as áreas de memória ficará estática. A razão da distribuição de memória alocada entre as áreas de memória depende da configuração do banco de dados que você selecionou.Segundo a documentação da Oracle, a proporção da distribuição de memória varia de acordo com os tipos de banco de dados:
– Finalidade Geral / Processamento de Transações: Alvo da SGA: 75% / Alvo Agregado da PGA: 25%
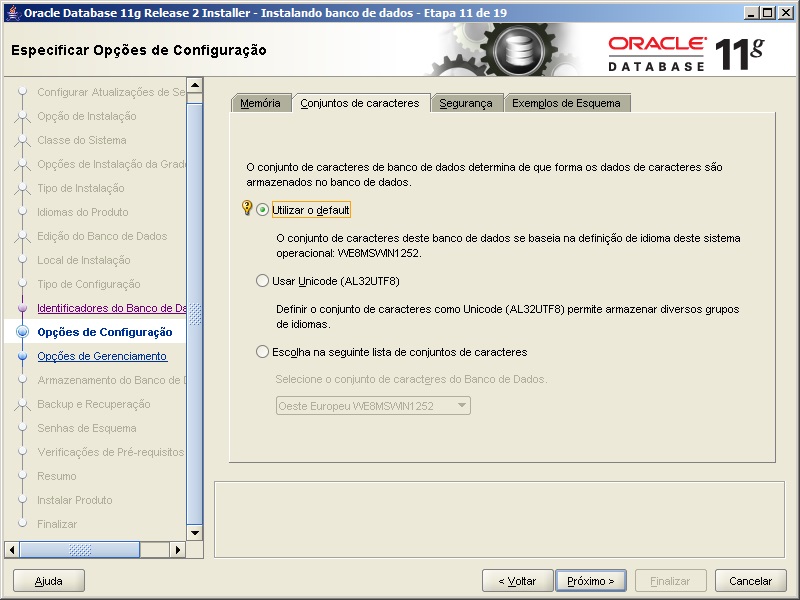
– Data Warehousing Alvo da SGA: 60% Alvo / Agregado da PGA: 40% - Na aba “Conjunto de caracteres”, podemos definir a codificação dos caracteres do nosso banco de dados. Você pode utilizar o defaut, que seria o WE8MSWIN1252 (ISO-8859), mas como o padrão de codificação de caracteres utilizado no desenvolvimento de sistemas e aplicações Web é o UTF-8, vou selecionar a opção “Usar Unicode” (lembre-se de validar com a sua equipe de desenvolvimento qual o padrão utilizado, para evitar conversões de charsets na interação Aplicação x Banco de Dados).
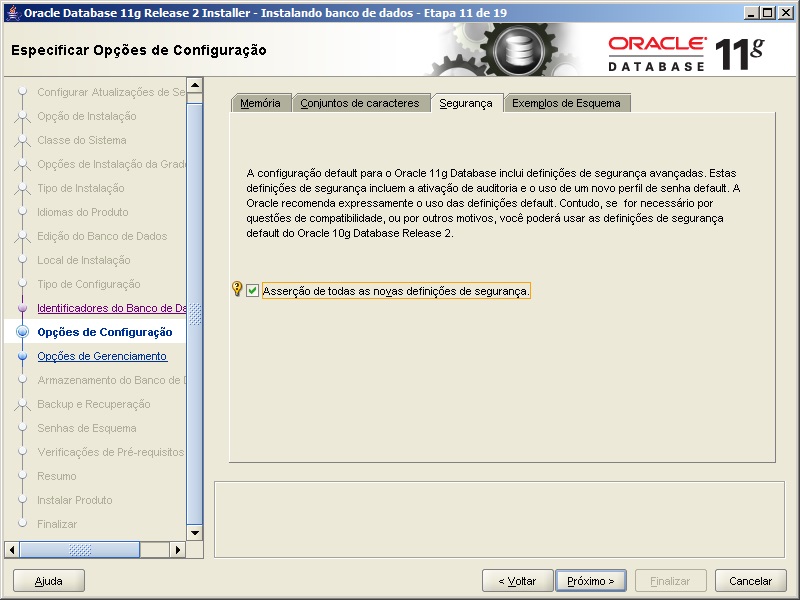
- Na aba “Segurança”, podemos selecionar a opção de ativar as configurações padrão de segurança da Oracle, que inclui ativação de auditoria e o uso de um novo perfil de senha (a Oracle recomenda que você use as definições default).
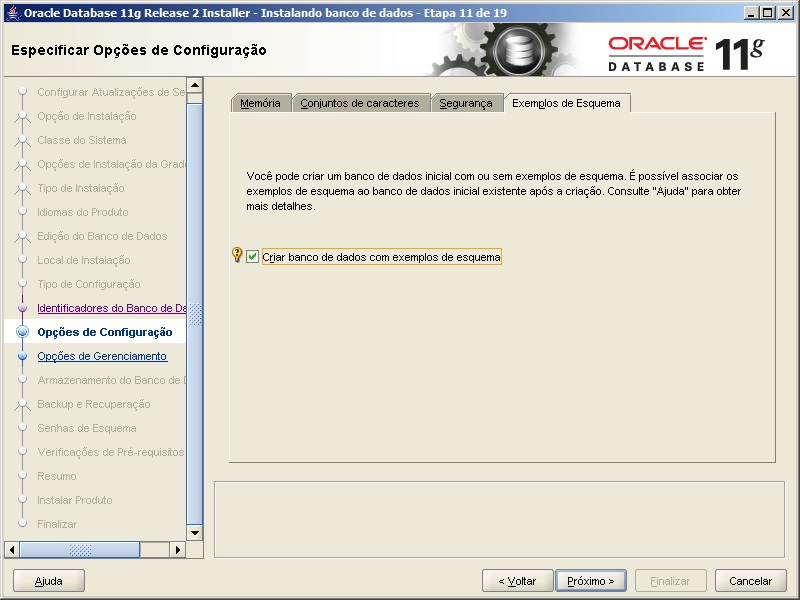
- Na aba “Exemplos de esquema”, você pode marcar essa opção para que seja criado um esquema de exemplo do seu banco de dados para facilitar em testes e estudos. Se você escolher instalar os exemplos de esquema, o Assistente de Configuração do Oracle Database cria o tablespace EXEMPLOS no banco de dados, exigindo 150 MB de espaço em disco. Se você estiver usando dispositivos brutos para o armazenamento do banco de dados, você deve criar e especificar um dispositivo bruto separado para este tablespace. Se você escolher não instalar os exemplos de esquema, você poderá criá-los manualmente no banco de dados após a instalação. Por motivos óbvios, não recomendo a marcação dessa opção em ambientes de Produção.
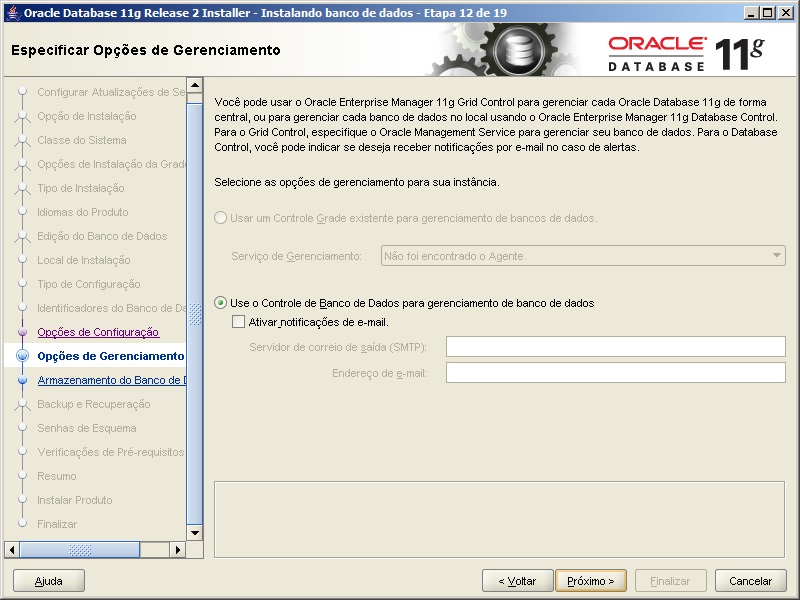
- Na etapa 12, podemos definir se iremos utilizar o Oracle Enterprise Manager 11g Grid Control, que é uma ferramenta para gerenciar todos os bancos de Oracle Oracle da sua rede de forma centralizada ou se iremos utilizar o Controle de Banco de Dados local, permitindo o envio de notificações por e-mail.
- Na etapa 13 é definido o sistema de arquivos do Oracle Database 11g. Selecionando a primeira opção, quem gerencia o fluxo de I/O é o sistema operacional e os arquivos são criados e fisicamente no disco. Já no ASM, quem gerencia o fluxo de I/O é o próprio banco de dados e isso geralmente se traduz em ganho de performance, segurança e confiabilidade. Infelizmente, a minha VM é 32 bits e o ASM não é suportado nessa plataforma. Sendo assim, vou marcar a primeira opção.
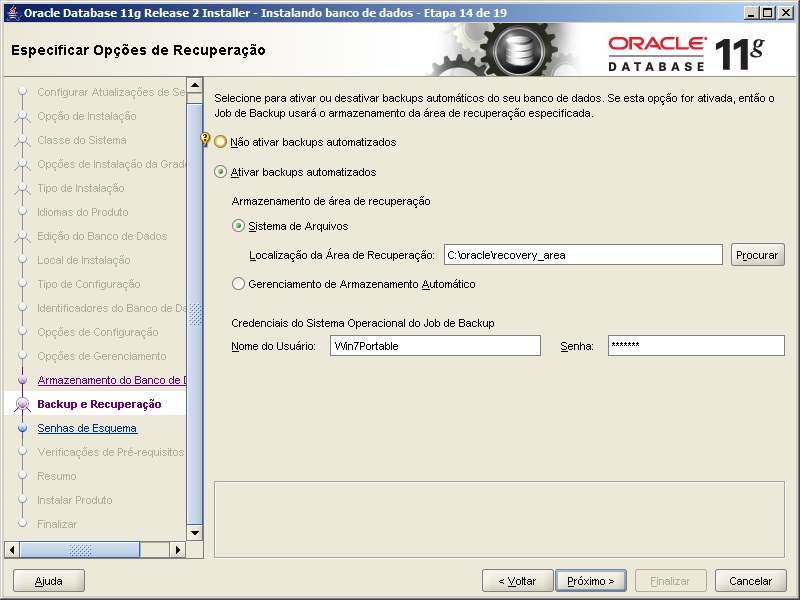
- Na etapa 14, definimos as opções de backup automático do banco de dados
-
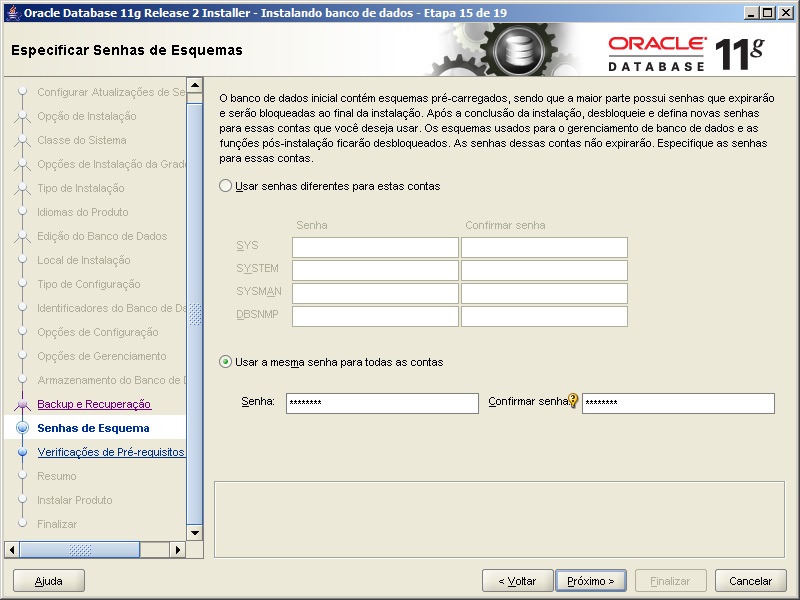
- Na etapa 15 são definidas as senhas dos esquemas de sistema do Oracle Database 11g. Temos a opção de definir uma senha para cada esquema ou usar a mesma senha para todos. Para ambientes de Produção, recomendo criar uma senha para cada esquema por motivos de segurança.
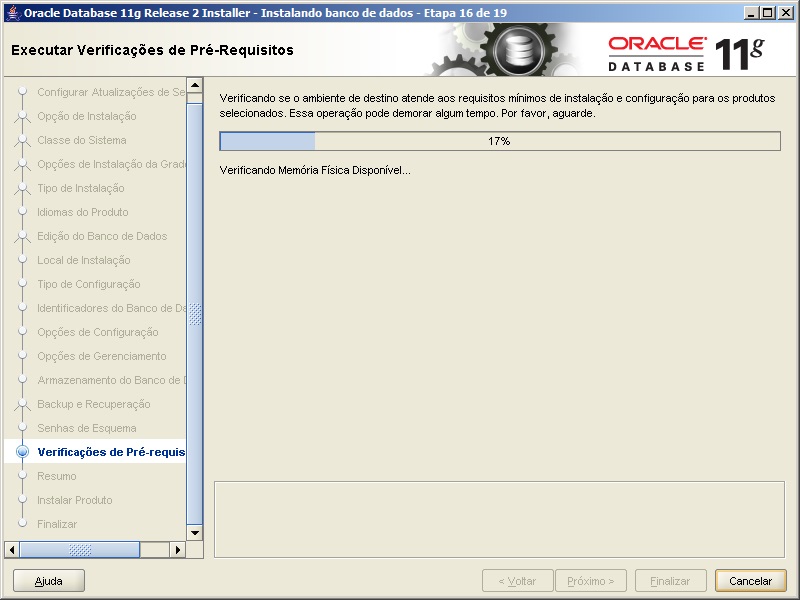
- Na etapa 16, o Oracle Universal Installer irá avaliar a sua máquina para verificar os requisitos mínimos para instalação
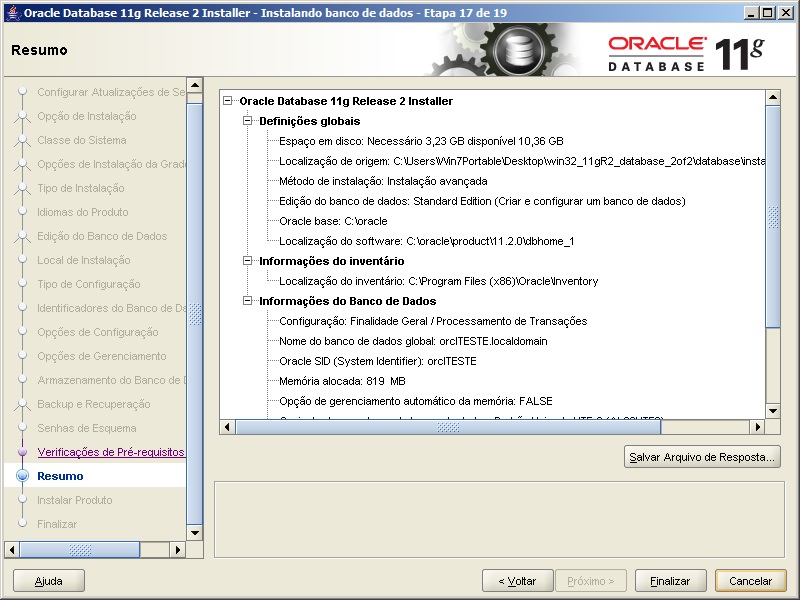
- Na etapa 17, o Oracle Universal Installer irá te mostrar um resumo das configurações selecionadas.
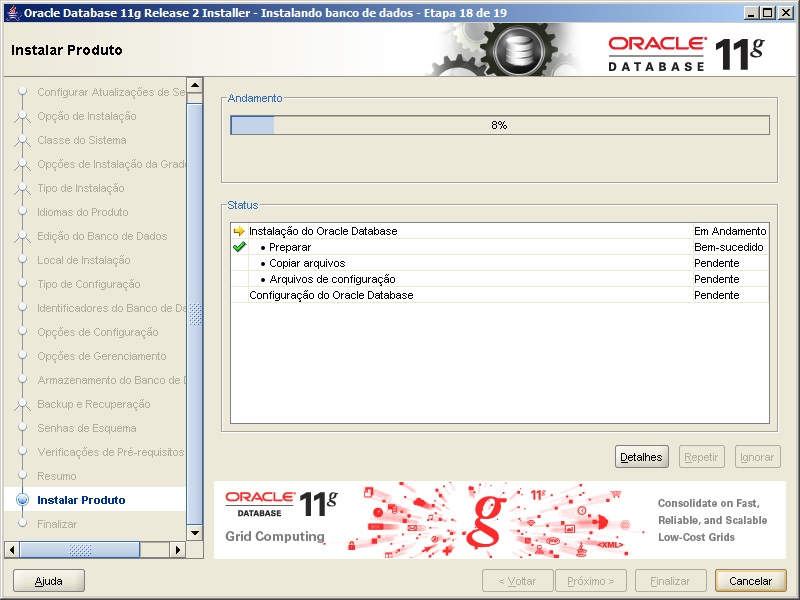
- Na etapa 18, será mostrado o progresso de instalação do Oracle Database 11g.

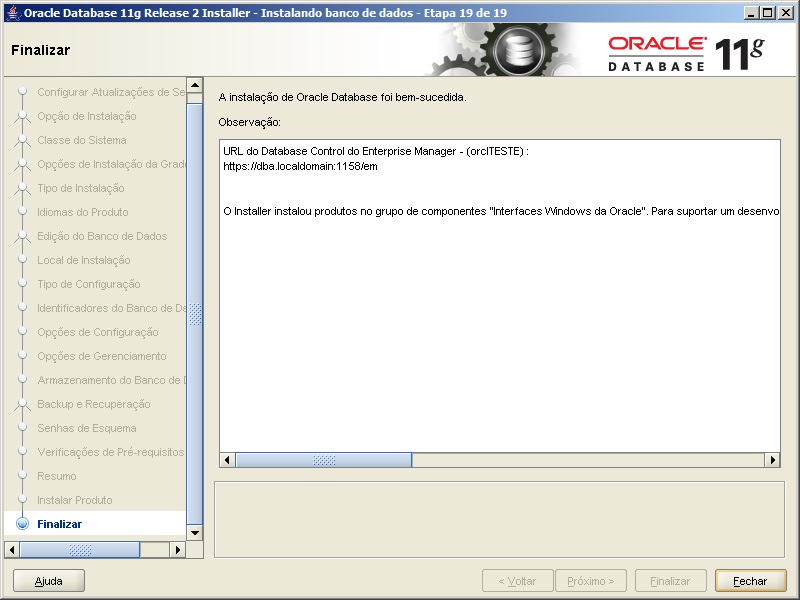
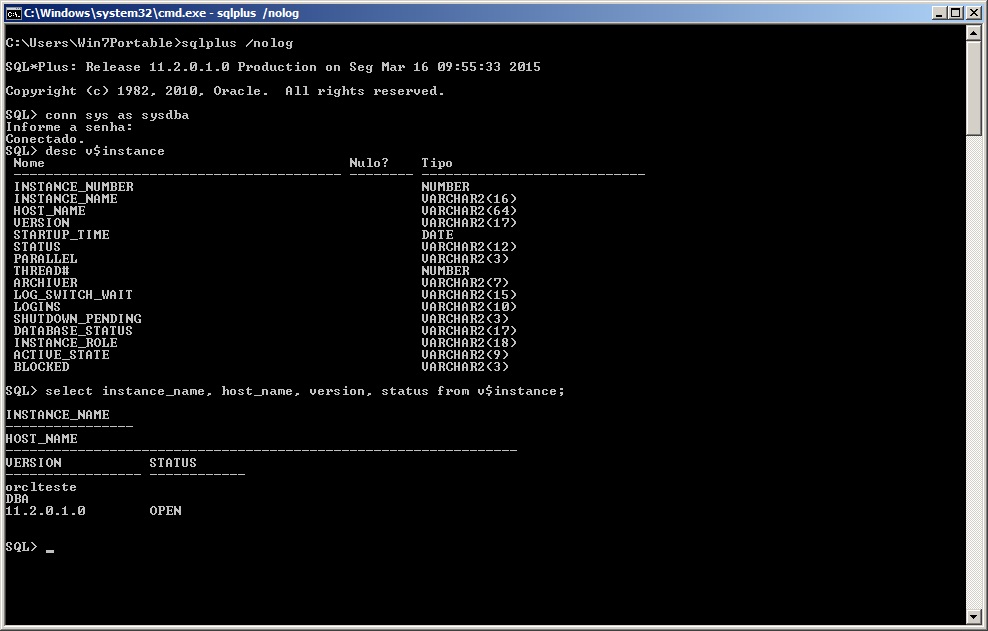
- Oracle Database 11g instalado com sucesso. Vamos agora testar a conexão com o banco

- Tudo certo com a instalação do Oracle Database 11g


Configurando para permitir conexões remotas
- Antes de iniciar, precisamos esclarecer 3 conceitos chave:
- sqlnet.ora: Arquivo de configuração que permite definir opções de conexão do Oracle Client, como forma de autenticação (SQLNET.AUTHENTICATION_SERVICES= (NTS)), forma de resolução de nomes de instâncias (NAMES.DIRECTORY_PATH=(TNSNAMES, EZCONNECT)), domínio padrão, etc.
- tnsnames.ora: Arquivo de configurações que permite definir a string de conexão de cada instância que você irá acessar.
Formato padrão: Nome_Personalizado.Dominio=(DESCRIPTION=(ADDRESS_LIST=(ADDRESS=(PROTOCOL=TCP)(HOST=nome_da_maquina.dominio)(PORT=1521)))(CONNECT_DATA=(SERVICE_NAME=nome_do_OracleSID)))
Formato padrão com loadbalance ativo: Nome_Personalizado.dominio=(description=(address_list=(load_balance=yes)(address=(protocol=tcp)(host=nome_da_maquina.dominio)(port=1521)))(connect_data=(service_name=nome_do_OracleSID)(failover_mode=(type=select)(method=basic)))) - listener.ora: Arquivo de configuração do Oracle Database que permite conexões remotas em seu banco de dados.
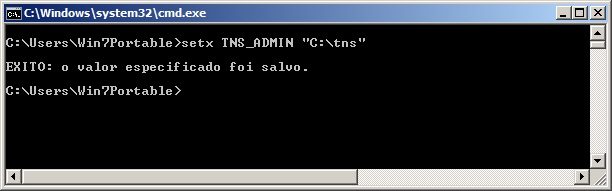
- Definir o diretório padrão para armazenar as configurações do client (tnsnames.ora, sqlnet.ora e listener.ora). Para isso, iremos criar uma variável de ambiente no Windows. Deste modo, você poderá definir manualmente o local onde seu arquivo tnsnames.ora estará localizado, mesmo que você possua mais de uma versão do Oracle Client instalado na sua máquina, evitando que cada versão do Oracle Client utilize configurações diferentes. Caso você não queira utilizar essa opção, o diretório padrão onde se encontra o arquivo sqlnet.ora, listener.ora e onde você deverá criar seu tnsnames.ora é C:\oracle\product\11.2.0\dbhome_1\NETWORK\ADMIN\

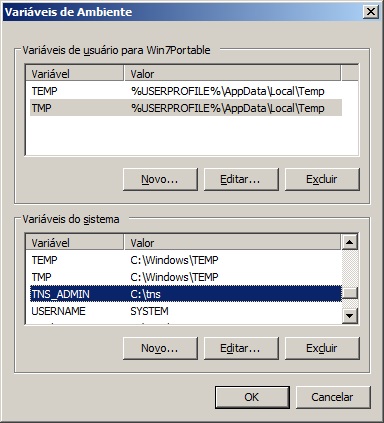
- Outra forma de configurar isso, é entrando no Menu Iniciar > Meu Computador > Botão Direito > Propriedades.
Depois disso, clicar na opção “Configurações avançadas do sistema” > botão “Variáveis de Ambiente” e adicionar o registro nessa tela 
- Exemplo de arquivo listener.ora:
123456789# Meu LISTENERLISTENER =(DESCRIPTION_LIST =(DESCRIPTION =(ADDRESS = (PROTOCOL = TCP)(HOST = dba)(PORT = 1521))))ADR_BASE_LISTENER = C:\oracle - Abra o gerenciamento de serviços do Windows (Iniciar > Executar > services.msc) e inicie os serviços OracleServices<Seu_SID> e OracleOraDb11g_home1TNSListener
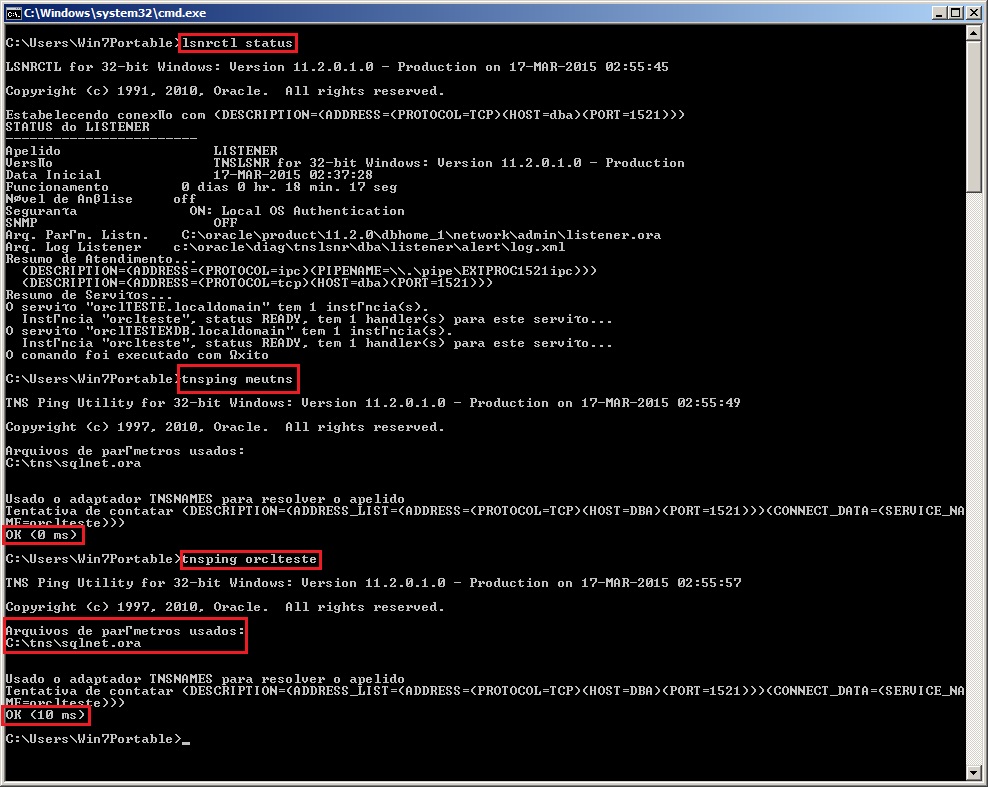
- Abra o prompt do DOS e digite o comando:
lsnrctl statuspara validar se o listener está ativo e funcionando

Obs: Não recomendo a utilização do Oracle com o Windows em ambientes de Produção, pois o desempenho e a estabilidade do banco rodando no Linux (especialmente Oracle Linux na plataforma x64 ou Solaris na plataforma x86) é bem superior. Futuramente vou criar um post de instalação do Oracle no Linux 🙂

Passei pelo mesmo problema com o server 2019, inicia e fecha antes de abrir a tela do instalador
Dirceu, estou tentando instalar o oracle oracle_win64_11gR2 em minha máquina, mas depois de clicar no setup.exe, aparece aquela tela do item 1, passa alguns segundos, ela desaparece e nada mais.
Alguma ideia do que pode estar acontecendo? Sei que é só na minha máquina. Windows 10 Home, SO de 64 bit…