Post Views 1,797 views
Boa noite!
Tudo bem ?
Hoje vou escrever esse post ensinando como criar uma máquina virtual (VM) usando uma das ferramentas freeware mais conhecidas para isso: O VMware Player.
Caso você queira saber como criar uma máquina virtual com o Oracle VirtualBox, fiquei à vontade clicando aqui e descubra.
VMware Player
- Baixe o VMware Player e instale em seu sistema operacional.
-

Tela Inicial do VMware Player
- Vamos clicar em Create a New Virtual Machine

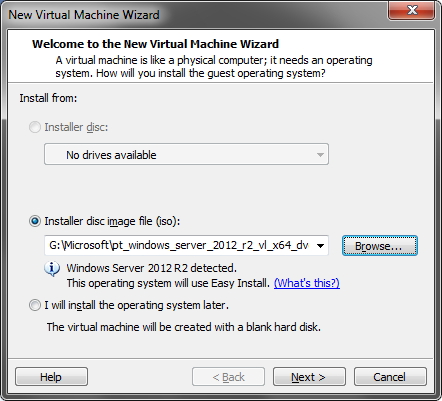
- Nessa tela, podemos criar a nossa VM de 3 formas distintas:
– Installer disc: Vai criar a VM e instalar o sistema operacional a partir do drive de mídia físico do PC.
– Installer disco image file (iso): Vai criar a VM e instalar o sistema operacional contido num arquivo de imagem ISO no seu computador, que você irá selecionar ao clicar no botão “Browse…”. Essa é a opção mais comum e a que irei utilizar nesse tutorial. Note que ao selecionar a ISO, o VMware irá reconhecer o sistema operacional contido na ISO na maioria dos casos..
– I will install the operating system later: Irá criar a VM sem sistema operacional, o qual terá que ser instalado manualmente depois. -

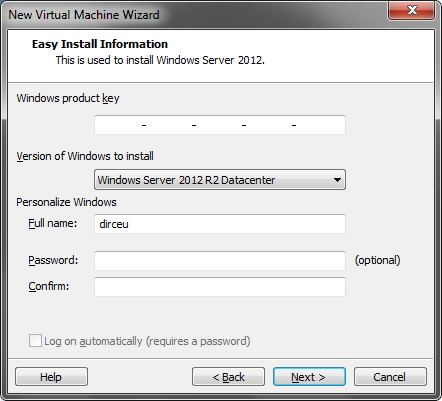
- No caso do sistema operacional Windows, surge a tela para definir a nossa Product Key (chave de ativação), a versão do Windows que iremos instalar e já configurar o usuário e senha do Windows. Isso é solicitado para que o VMWare já instale o sistema operacional de forma automática, sem a necessidade de intervenção humana.
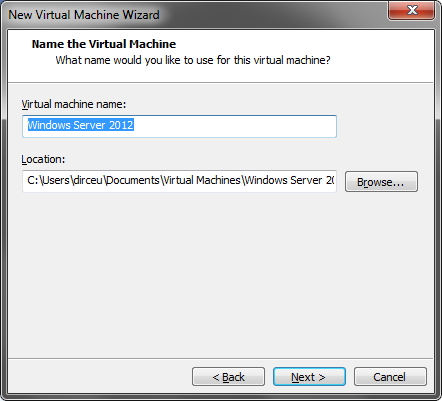
- Agora iremos definir o nome da nossa máquina Virtual e onde ela será salva no HD.
- Definimos o tamanho máximo do HD da máquina virtual. Caso seja necessário aumentar futuramente, podemos fazer isso pela tela de configuração da VM, e depois teremos que executar alguma ferramenta de particionamento dentro do sistema operacional da VM, como o Paragon Partition Manager. Aqui definimos também, se os arquivos físicos da VM no seu computador (extensão vmdk) serão gravados em um arquivo só, ou divididos em vários arquivos. Criando um arquivo só (opção que eu utilizo) deixa a utilização da VM mais rápida e diminui o risco de corromper a sua máquina virtual, mas se você precisar copiar para outro local, isso irá demandar mais tempo.
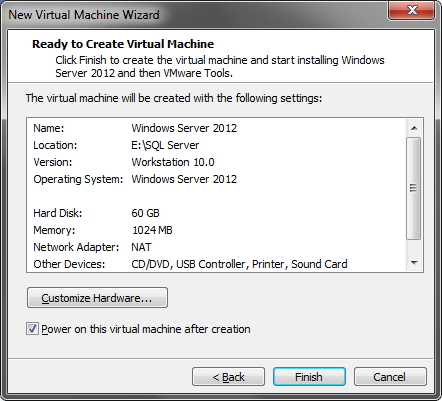
- Aqui podemos confirmar a instalação e as configurações selecionadas para a nossa VM. Se você desejar alterar o hardware da sua VM, basta clicar no botão “Customize Hardware…”, o qual eu irei demonstrar agora (isso é opcional. Caso não deseje alterar nada, basta clicar no botão “Finish”).

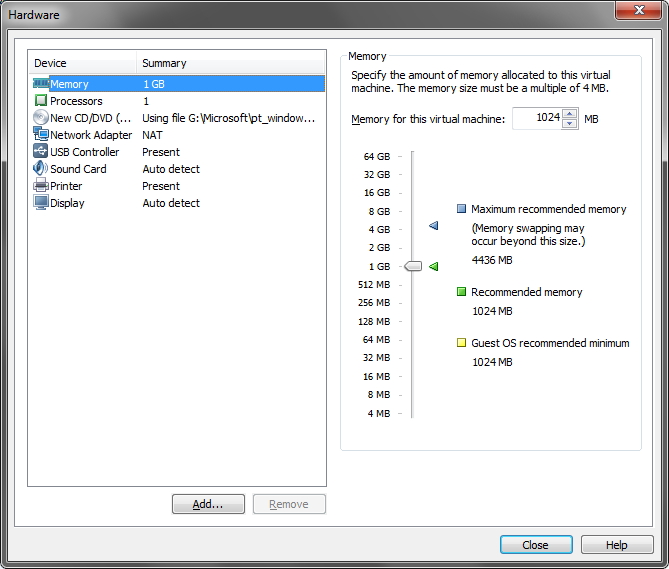
- Nessa tela, podemos alterar a quantidade disponível de memória RAM da sua VM. O software já traz os valores recomendados, máximo recomendado e o mínimo exigido pelo sistema operacional. Lembre-se que a memória RAM é compartilhada entre a VM e a sua máquina física, então nunca coloquei mais de 50% da sua RAM total na VM. Nessa tela, também é possível aumentar a quantidade de núcleos da sua VM, alterar a ISO de instalação, configurar a forma de conexão de rede, etc.. Sinceramente, não recomendo alterar essas outras configurações a menos que você tenha algum problema com elas.
- Faça as alterações necessárias e clique em “Close” para voltar na tela anterior
- Clique em “Finish” para finalizar a instalação.


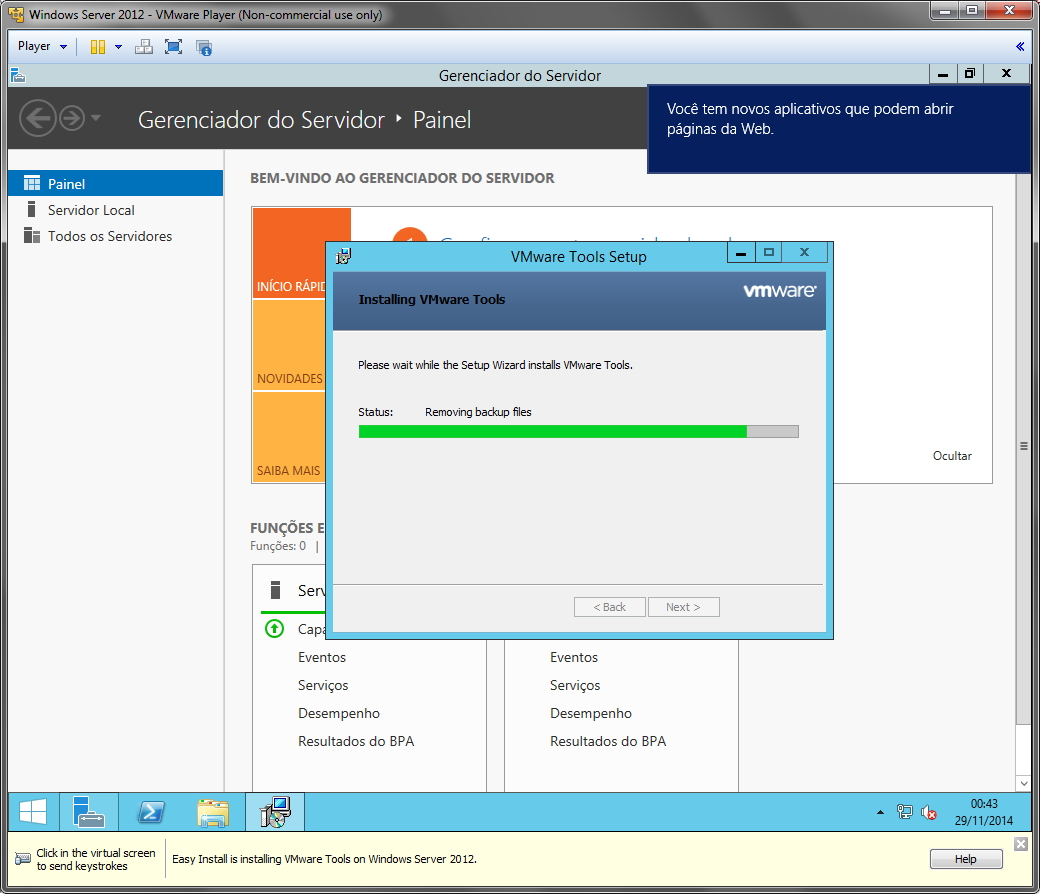
- Nossa VM já está quase pronta.. Como vocês podem ver, já estou usando o Windows Server 2012, e agora resta apenas configurar o VMware Tools, que é um conjunto de ferramentas do VMware para facilitar a utilização da sua máquina virtual. Dentre os recursos que ela nos fornece, eu destaco a capacidade de auto-espandir a tela sempre que você redimensionar a janela e o sincronismo de área de transferência, ou seja, você aperta Ctrl+C na sua VM para copiar um texto ou arquivo e aperta Ctrl+V na sua máquina física para colar o que foi copiando e vice-versa. Também é possível transferir arquivos entre a máquina virtual e a física arrastando e soltando os arquivos.
- Geralmente o VMware Tools é instalado de forma automática, mas caso não seja, basta clicar no menu “Manage” e depois no sub-menu “Install VMware Tools”.


Opções de Energia
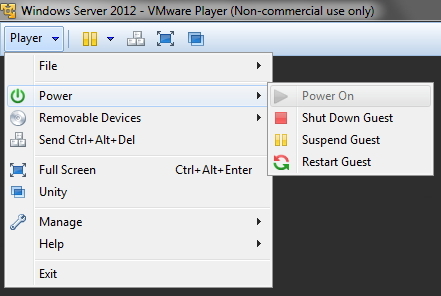
- Power On: Serve para ligar a sua máquina virtual quando ela estiver desligada. No print ela está desabilitada, pois a VM já está ligada.
- Shut Down Guest: Serve para desligar a máquina virtual de forma brusca, simulando um desligar usando o botão de Power do seu gabinete. Não recomendo utilizar essa opção, pois pode corromper a sua VM, assim como pode danificar sua máquina física ao fazer isso. Sempre desligue a sua VM pelo próprio sistema operacional.
- Suspend Guest: Permite que o VMware guarde a situação exata da sua máquina virtual (incluindo os programas abertos, tudo), salva esse bloco de memória RAM no seu HD e desliga a sua VM. Quando você ligá-la novamente, ela vai iniciar exatamente no ponto que você estava.
- Restart Guest: Reinicia a sua máquina virtual de forma forçada, igual ocorre no Shut Down Guest, simulando um pressionamento no botão de Reset do gabinete. Também não recomendo a menos que a máquina virtual tenha travado e o Ctrl+Alt+Delete não resolva.
Removable Devices
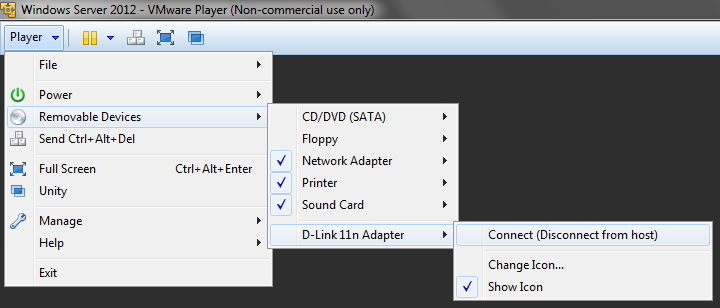
- Esse menu serve para que você escolha qual dispositivo ficará conectado na máquina virtual ou na máquina física. Um pendrive, por exemplo, você pode definir que ele ficará disponível na VM ao invés da máquina física, por exemplo, e você poderá trabalhar com os arquivos do pendrive de dentro da máquina virtual.
Unity

- Talvez esse seja um dos melhores recursos do VMware Player!!! Ele permite que você utilize os programas da sua máquina Virtual JUNTO com os da sua máquina física, aparecendo na sua barra de tarefas inclusive. Isso permite executar softwares para Linux e MAC dentro do seu sistema operacional Windows como se fossem nativos e vice-versa.
Pastas Compartilhadas
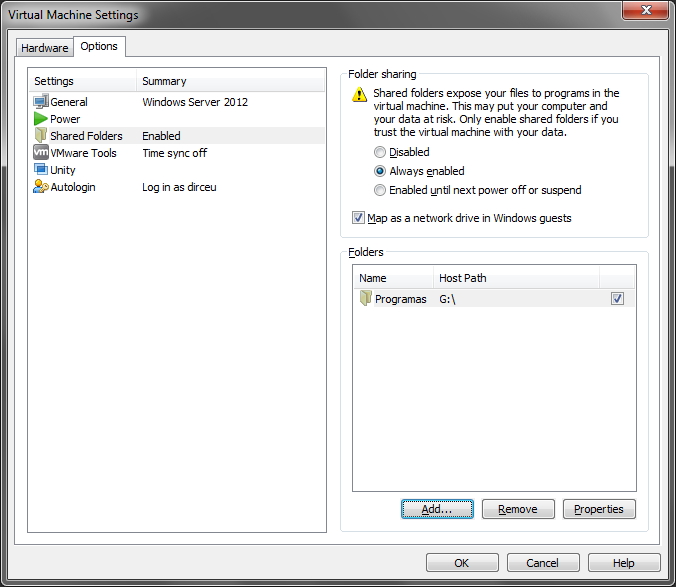
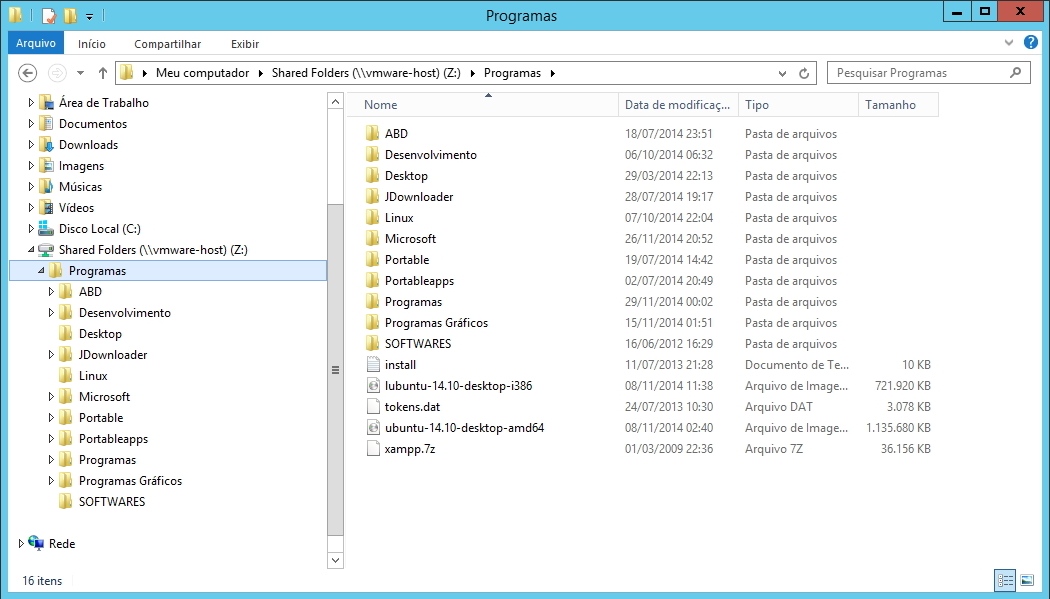
- Outro recurso muito interessante e útil do VMware, é a possibilidade de criação de pastas compartilhadas na sua máquina virtual com o seu Desktop, seja compartilhando uma pasta ou uma partição inteira. Após selecionar as pastas e ativar o compartilhamento, o acesso aos arquivos da máquina física através da VM é simples assim:

E com isso, encerramos esse tutorial!
Espero que tenha sido útil e até a próxima!