Post Views 2,196 views
Olá!
Boa noite!
Recentemente fiz um tutorial ensinando a criar uma máquina virtual utilizando o VMware Player. Agora, vou mostrar como fazer a mesma coisa, utilizando outro ferramenta freeware super conhecida e rival do VMware, o Oracle Virtualbox (Antigo Innotek VirtualBox).
Oracle VirtualBox
- Baixe o Oracle VirtualBox e instale em seu sistema operacional.

- Clique no botão “Novo”

- Diferente do VMware Player, aqui nós escolhemos manualmente a versão do Windows. Note que não existe a opção Windows Server na lista. Vou usar a opção “Other Windows (32-bit)”.

- Aqui podemos definir a quantidade de memória RAM iremos utilizar na máquina virtual. O software já traz o valor recomendado de acordo com o sistema operacional. Lembre-se que a memória RAM é compartilhada entre a VM e a sua máquina física, então nunca coloquei mais de 50% da sua RAM total na VM


- Aqui vamos escolher o tipo de disco rígido da máquina virtual. Eu recomendo usar o tipo VDI, que é o padrão do VirtualBox. Uma outra sugestão, é utilizar o VMDK, que é o padrão do VMware Player e pode ser utilizado por ele também.

- Aqui vamos definir se o disco virtual da VM será criado com um tamanho fixo pré-alocado (já consumindo todo o espaço em disco definido) assim que criarmos a VM, ou se ele será alocado dinamicamente, ou seja, a medida que for necessário mais espaço, a máquina virtual irá alocando automaticamente até o tamanho limite pré-definido na tela seguinte.

- Nesta tela, vamos definir o nome da máquina virtual e o tamanho máximo do disco.

- Vamos clicar agora em “Armazenamento” abrir a tela de configurações e selecionar a ISO de instalação do sistema operacional.

- Após selecionar o arquivo ISO, a tela deverá aparecer assim.

- Nesta tela, podemos configurar a quantidade memória e núcleos da máquina virtual, pastas compartilhadas, redes, etc..
-

Configurações de Placa Mãe e Memória
-

Configurações de Processador
- Clique no botão “Iniciar”

- Selecione o disco de boot da sua máquina virtual. Como estamos instalando, será o drive de CD/DVD que usaremos para a instalação do Windows Server 2008 R2.
- Ao clicar em OK, irá abrir uma outra janela ao fundo, onde a máquina virtual será executada. Pode fechar ou minimizar a tela inicial do VirtualBox e mude o foco para a janela de execução da máquina virtual.
- Ao clicar na janela onde a máquina virtual está sendo executada, aparecerão vários alertas lhe ensinando a utilizar o VirtualBox. Note que ao clicar na janela, seu mouse ficará “preso” dentro dela. Para sair, aperte a tela Ctrl da direita (ao lado da seta esquerda). Esse tecla pode ser alterada na tela de configurações.

- Após a instalação do Windows, nosssa máquina virtual está configurada e instalada.

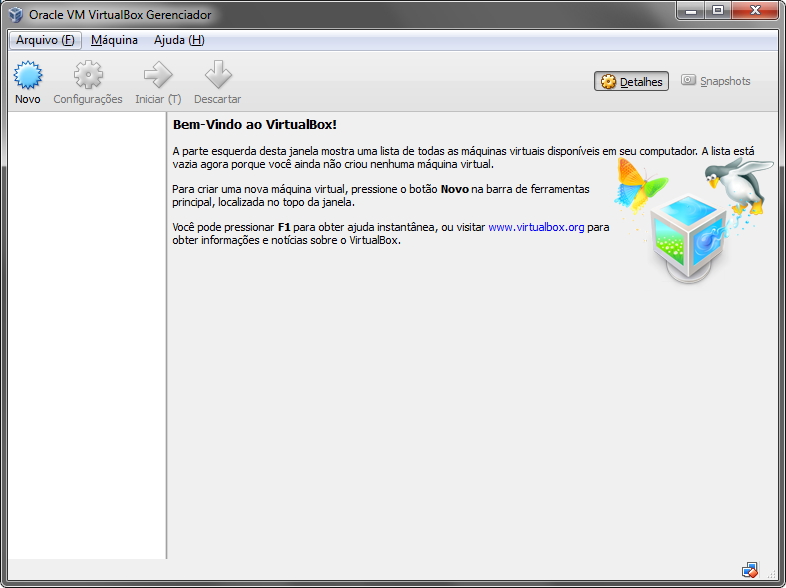
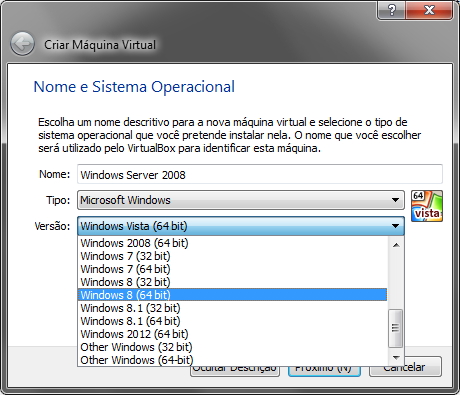
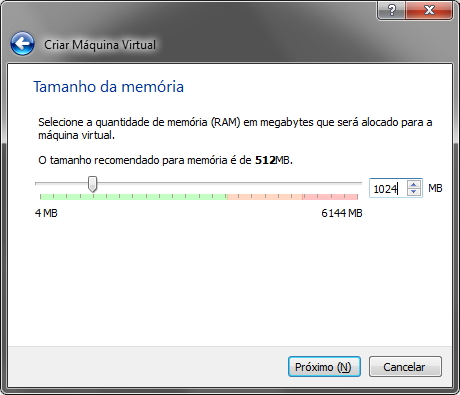
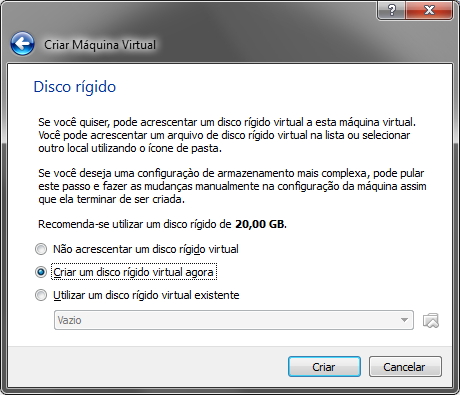

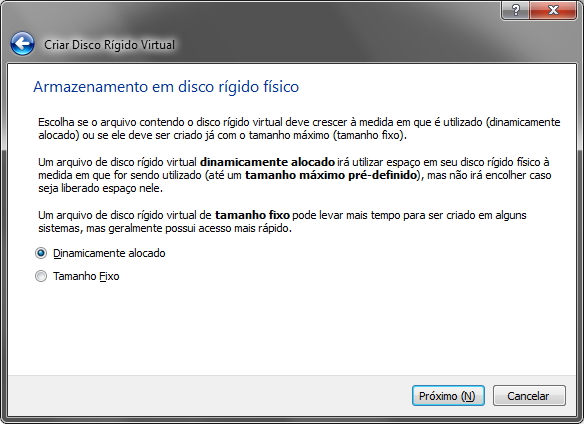
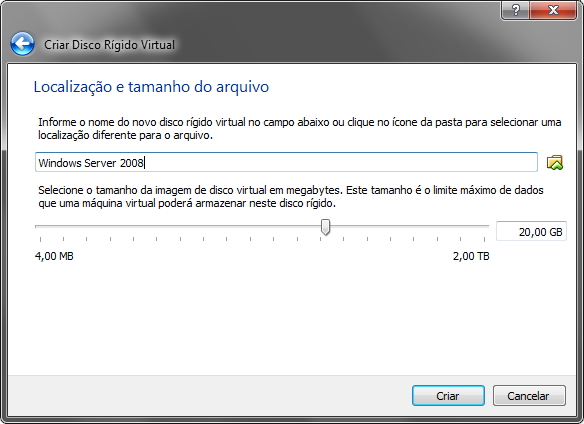

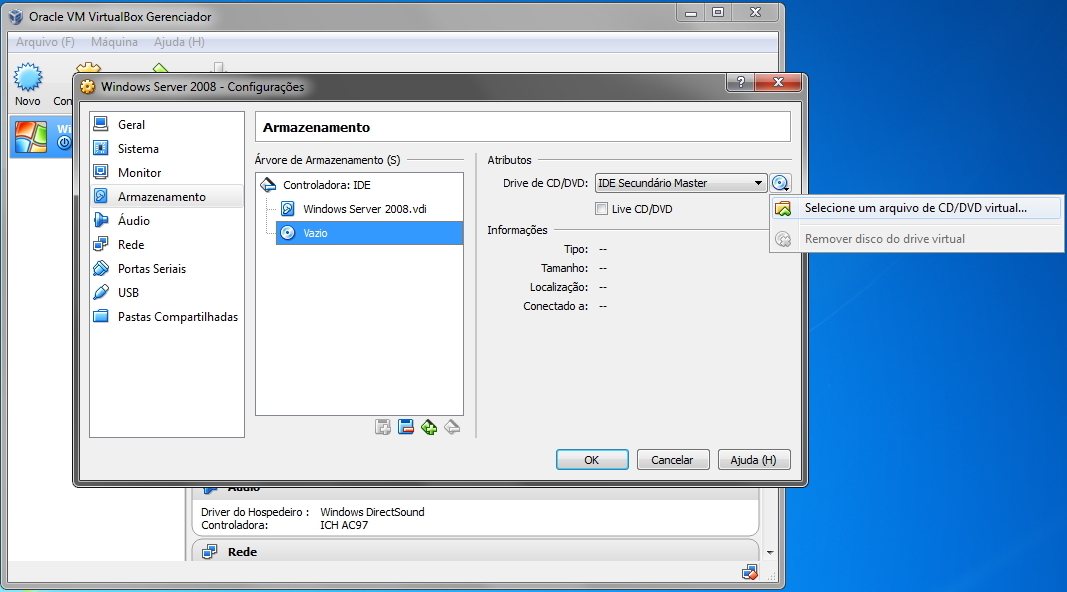
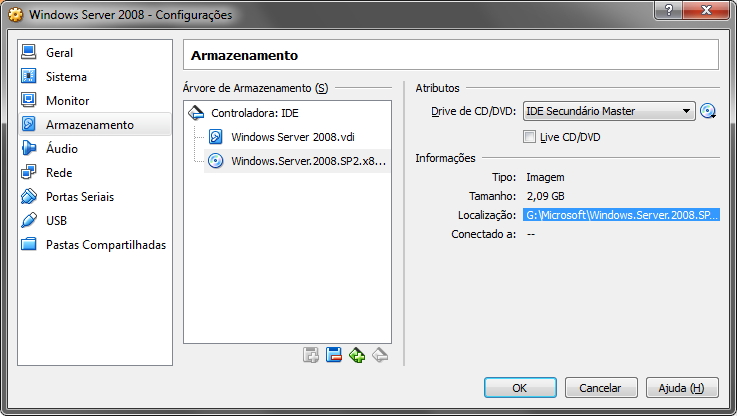
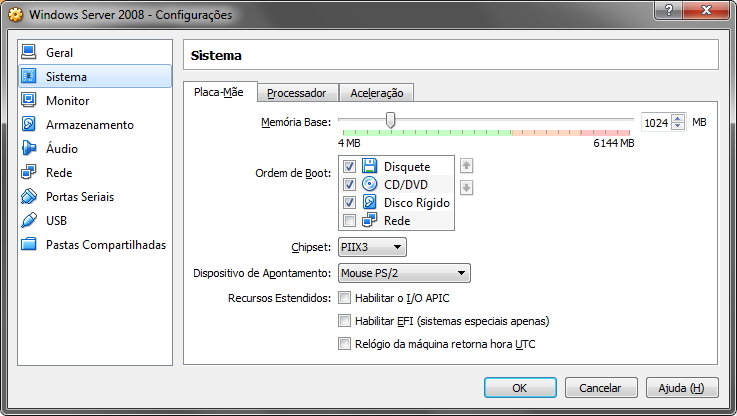

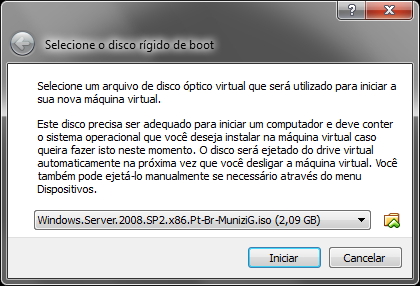
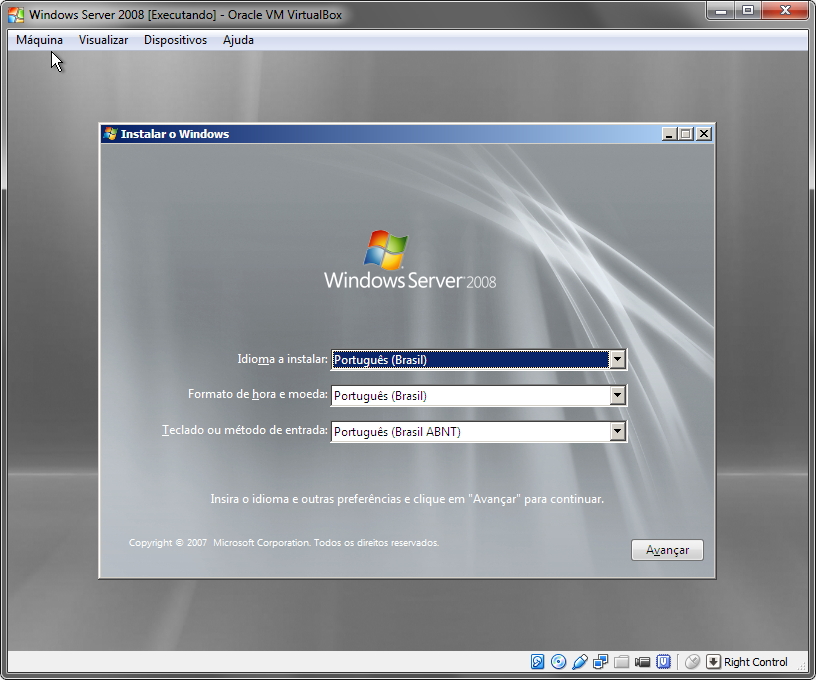
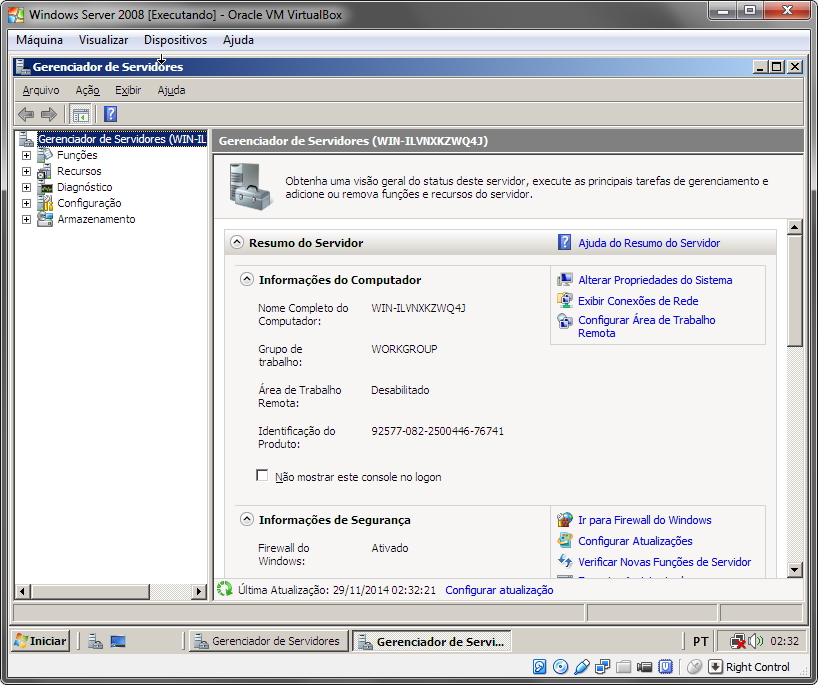
Imagem para convidados

- Semelhante ao VMware Tools, essa ferramenta adiciona o recurso de ajuste automático da resolução da máquina virtual de acordo com o tamanho da janela e melhora a integração do mouse entre a máquina física, não travando mais o mouse ao clicar dentro da janela do VirtualBox.
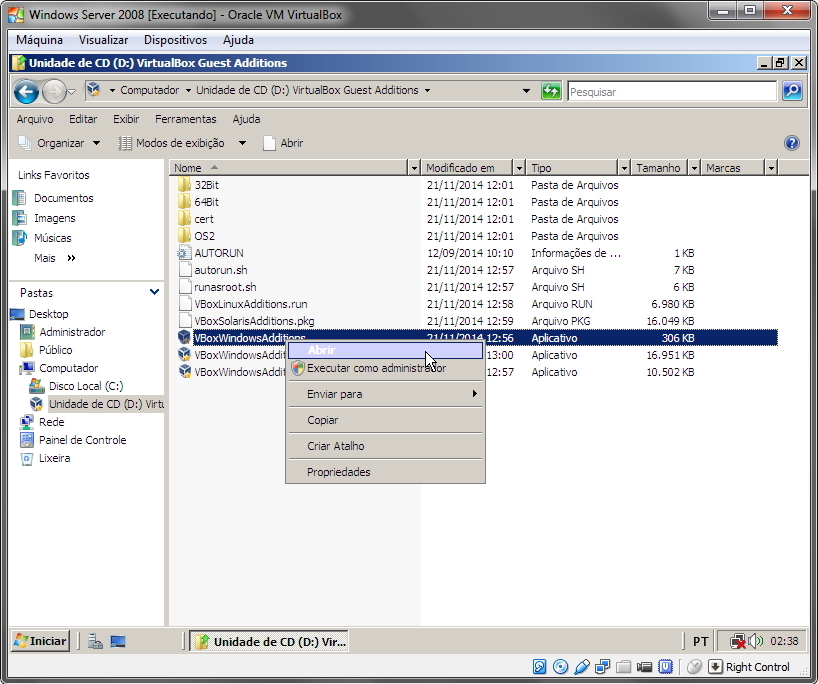
- A instalação é manual. Você precisa abrir o Windows Explorer (ou Meu Computador), ir em “Unidade de CD” e depois executar o programa. A instalação é bem simples, padrão “Next, Next, Finish” mesmo, aparecendo apenas alguns alertas de instalação de driver.

- Reinicie a máquina virtual para a instalação fazer efeito.
Área de transferência compartilhada e Arrastar e Soltar (Drag N’Drop)
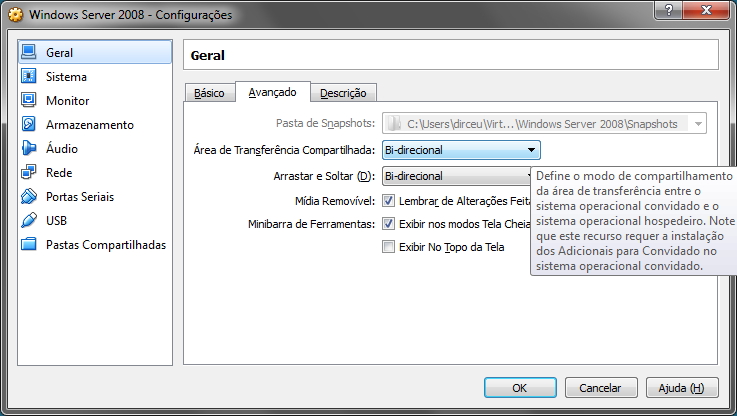
- Essas configurações permitem habilitar a área de transferência compartilhada, o que permite que tanto a máquina virtual tanto a máquina física “enxerguem” a mesma informação, sendo possível copiar um texto ou arquivo na máquina virtual (Ctrl+C) e colar na máquina física (Ctrl+V) e vice-versa.
- Também é possível habilitar o recurso de arrastar e soltar, para transferir arquivos entre as máquinas de forma mais fácil e intuitiva.
- Modos possíveis:
– Desabilitado
– Hospedeiro para Convidado (A máquina física consegue visualizar a área de transferência da virtual, mas o contrário não)
– Convidado para Hospedeiro (A máquina virtual consegue visualizar a área de transferência da física, mas o contrário não)
– Bi-direcional (funciona entre as duas máquinas)
Pastas Compartilhadas
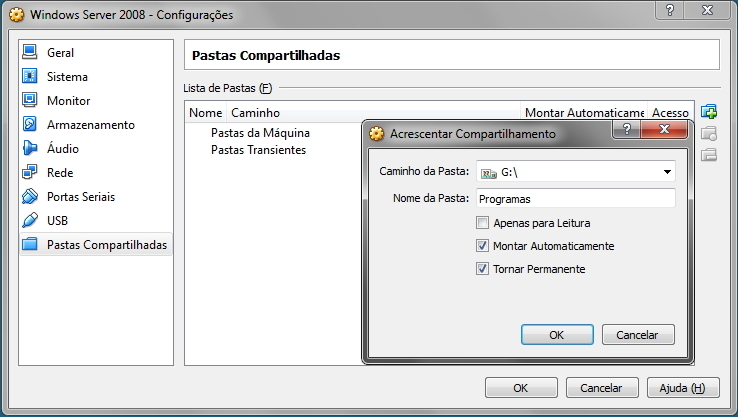
- Outro recurso muito interessante e útil do VirtualBox, é a possibilidade de criação de pastas compartilhadas na sua máquina virtual com o seu Desktop, seja compartilhando uma pasta ou uma partição inteira.
Capturas de tela
- Um recurso interessante que o VirtualBox possui e que o VMware não, é o recurso de captura de tela, que permite tirar um print screen da tela ou gravar um vídeo com o que é feito na máquina virtual, tudo isso nativo.
Opções de Energia
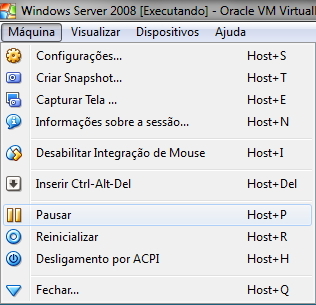
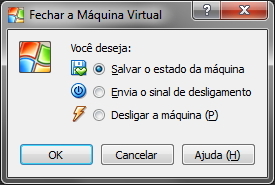
- Desligar a máquina (P): Serve para desligar a máquina virtual de forma brusca, simulando um desligar usando o botão de Power do seu gabinete. Não recomendo utilizar essa opção, pois pode corromper a sua VM, assim como pode danificar sua máquina física ao fazer isso. Sempre desligue a sua VM pelo próprio sistema operacional.
- Enviar o sinal de desligamento: Serve para desligar a máquina virtual utilizando um comando de desligamento que é enviado para o sistema operacional, para que ele se encarregue de desligar o computador da forma correta, sem correr risco de danificar algum arquivo.
- Pausar ou Salvar o estado da máquina: Permite que o VirtualBox guarde a situação exata da sua máquina virtual (incluindo os programas abertos, tudo), salva esse bloco de memória RAM no seu HD e desliga a sua VM. Quando você ligá-la novamente, ela vai iniciar exatamente no ponto que você estava.
- Reinicializar: Reinicia a sua máquina virtual de forma forçada, igual ocorre no Desliugar a máquina (P), simulando um pressionamento no botão de Reset do gabinete. Também não recomendo a menos que a máquina virtual tenha travado e o Ctrl+Alt+Delete não resolva.
E é isso pessoal,
Até a próxima!